
Step Up in Style: DIY Stair Runner with Gorgeous Brass Rod Accents
Hello, DIY friends! Join me today as I give my stairs a much-needed step up! A few years ago, I made over my staircase and painted the stairs a beautiful black. I'm still in love with how this looks, but I decided to add a carpet runner to keep me and my dog from slipping and falling. Follow along as I prep the stairs and add a beautiful one-of-a-kind runner (with some brass details) to my main staircase.

Materials and Tools List

So, can you DIY your own stair runner? Yes of course! All you need are the right tools and materials (and even then, I improvised a bit). Here’s what I used to make mine:
Carpet runner of your choice - Mine was from Etsy!
Carpet pad for underlay (optional)
Behr Porch and Patio paint (if you wish to repaint your stairs)
Brass rods (from hardware store)
Brass hardware and screws (amazon)
Tape measure
Paint roller
Level (or another straight edge)
Box cutters
Staple gun
Scissors (for cutting off tassels)
Joint knife (or a proper knee kicker if you can justify the cost)
Can you use a rug as stair runner?

Absolutely you can use a rug as a stair runner! This is exactly how I created mine. I did some shopping around and decided on a gorgeous kilim-style runner that I found on Etsy in a store called GovindArtRugs. This shop had so many different options for all kinds of tastes and requirements!
Before you fall in love with a rug, get out your tape measure and figure out the width of your stairs. My stairs are 27.5" wide (which is not very wide in the world of stairs). With such a narrow staircase, I did struggle to find a rug that would work. Thank goodness for Etsy! If you have a really tight budget, a pretty outdoor rug would do the trick too. As long as the rug you choose is flat and low pile, you should be good to go.
The rug I chose is a thin, jute material 24" wide. I was looking for something that would pull colors from my house and tie the space together, and this rug does just that. In fact, I didn't realize it when I bought it, but the colors in the rug are the same ones that I used for my DIY rock wall art that I created for the foot of the stairs - so, I knew I was on the right track!
If you're wondering how to calculate the amount of carpet you need once you find the perfect material and pattern for your own stair runner, it's easy! As a starting point, we just need to understand a bit of staircase jargon:
Riser: the vertical piece at the back of each step. The height of the riser = the height of each stair
Tread: the piece you walk on. The width of the tread = the width of your stair
Nose: the rounded front of your step
Now I can share my formula for calculating carpet length!

Height of your riser X number of risers in your staircase = A
Depth of your tread X number of treads in your staircase = B
(A+B) + 10 inches = Number of inches of carpet length that you need. The extra 10 inches allow for the carpet to cover the nose of your stairs and give you some breathing room.
The Carpet Pad
I decided on a little extra luxury and added a carpet pad underneath the runner. This is totally optional and up to your personal preference if you want to include it or not. I believe it makes your stair-climbing experience a bit more comfortable! I think it also helps keep the carpet runner in place with a little more traction. I went to a professional carpet store and took their advice for a comfy stair runner underlay. Picture the rubbery turf at an indoor soccer or sports training center, and that's exactly what I bought for under my new runner! It's a thin, rubber mat material about 1/4" thick and it adds just the right amount of comfort without too much height.

Prep Work: Stair Refresh
Before I installed the carpet, the first thing I did was give the stairs a bit of a refresh. It had been three years since I painted them and while they held up pretty well, they had some nicks and scratches. I decided there was no point putting a beautiful runner on without a fresh coat of paint! My favourite paint for high-traffic flooring is Behr Porch and Patio Paint. It is literally designed for people to walk on, so it is durable and holds up well to hard use. It works great on either wood or concrete, for indoor or outdoor use. It's also mildew resistant and incredibly easy to clean. So, you COULD go with scuff-resistant paint or even a satin or gloss paint, but why would you when the perfect flooring paint exists?
Decisions, Decisions
Even though this was a fairly easy DIY project, it did have some challenges! The first obstacle I had to overcome was a design issue. My stairs include a landing, which means the carpet runner has to change direction somehow before it reaches the bottom of the stairs. The design plan did not originally include running carpet at an angle! I had to decide how I would solve this problem. I came up with three possibilities:
Run the carpet all the way to the bottom step, leave the landing uncarpeted, and then continue the stair runner for the last two steps
Run the carpet down the stairs and across the landing, all the way to the wall, and then use a new piece of runner for the last two steps
Run the carpet all the way to the bottom step and then start a new piece on the far wall that runs across the landing and down the last two steps

In the end, I decided to go with option three: end the carpet at the bottom of the first set of stairs and then carpet the landing and the last two steps in the same direction. I found an article that featured Emily Henderson sitting on some stairs that were carpeted just this way, and I decided that if Emily Henderson could do it, so could I!
Installing the Underlay
First, I cut the pieces of underlay that I needed for each stair. I decided to make each piece 23.5" wide, which gave me 1/4" of play on each edge of the runner. I gathered my tape measure, straight edge, and box cutters, and got to work! I measured and cut all the rubber pads I needed at the same time and brought them all over to the stairs for easy installation.

I knew that my stairs were 27.5" wide, and the width of the rug was 24". So, that meant I had 1 3/4" on either side of the rug. I needed to make sure that I marked this somehow on every stair to ensure the rug stayed centered all the way down. I thought about marking each individual stair but that seemed difficult and time consuming. Black Sharpie won't show up on black stairs, and marking each step with painter's tape would take so long. I ended up cutting two pieces of the leftover rubber mat that were the right length and width for the space on either side of the rug. Then, I could just move these pieces to the next stair, place my rubber rug pad section on the tread, install it, and move the pieces to the next step again.
I used my staple gun to secure each section about 1/4" from the back and front of the stair tread. I was playing with a new tool (this staple gun is SO COOL) and I got a little trigger-happy with the amount of staples. I think you really only need to staple down the four corners and put one in the center of the front and back of each piece. You can also use a small hammer to give the staples a little tap and make sure they are in as far as they go.

Installing the Carpet
Once I removed the tassels, my carpet was ready to go. My instinct was to start at the top and work my way down to the bottom. But, when I bought my underlay, the professionals told me the right way to do a project like this is to start at the bottom and work your way up. I thought long and hard about this and decided it would be best to go with the professionals! So, I did the right thing and started at the bottom.
How do stair runners stay in place?

Let me assure you that you do not need to be a professional carpet layer to make this work. I sat on the landing and laid the roll of carpet out on the steps above me. I started by stapling the end of the carpet under the tread nose of the first step. I didn't have a knee kicker to keep the carpet tight against the base of the stair riser while I worked (only one new tool per project, Danie!). Instead, I used a large joint knife with a nice flat edge to keep the carpet in place.
I flattened the carpet out over the entire depth of the stair tread and against the base of the first riser. I put some staples in to hold it tight on the outer edges of the runner and the back too. It worked! Now all I had to do was repeat the process up the entire length of the staircase.

This DIY stair runner project was simple enough in theory, but it actually ended up being really tiring! Rolling out the carpet and keeping it tight while I stapled it and going up and down the stairs gave me a really good workout. I ended up just taking things one step at a time (literally and figuratively!) until I reached the top.

At the top, I was able to easily remove the transition piece that covered the top of the stairs leading into the main flooring area. This was very handy since it allowed me to staple the rug end at the top of the stairs and then put the transition piece back over it for a nice seamless look.

For the landing, I started at the top and then worked my way down. This was because the landing area was VERY visible, and I didn't want a raw edge meeting the wall there. It was only two steps so I hope the professionals will forgive me!
A word of warning: don't use too many staples! I actually ended up taking some of the staples out. Less is more here. Just make sure you have enough to tack the carpet down without using so many that they are clearly and obviously visible.

Finishing Touches
The carpet was installed! But I wasn't finished yet. I still wanted to add a decorative element to give my new staircase runner a bit of flair. You all know I love a hint of vintage and that brass is my metal of choice (there is brass in every room in my house!). I decided to incorporate both these elements by adding a brass rod with hardware at the back of the steps where the riser and tread meet.
I purchased some brass rods and hardware and brought my vision to life. I put my safety glasses on, grabbed my grinder, and cut the rods down to size (the width of the stair tread). You want to make sure they are longer than the width of the runner itself because you need room on the step to attach them using screws and hardware. When they were all cut, I cleaned the rods with brass cleaner to make them shine.

Then, I used my impact and some brass-coloured wood screws to attach the rods at the very back of the step where the tread and riser meet. I pre-drilled the holes to prevent any cracking of the treads.
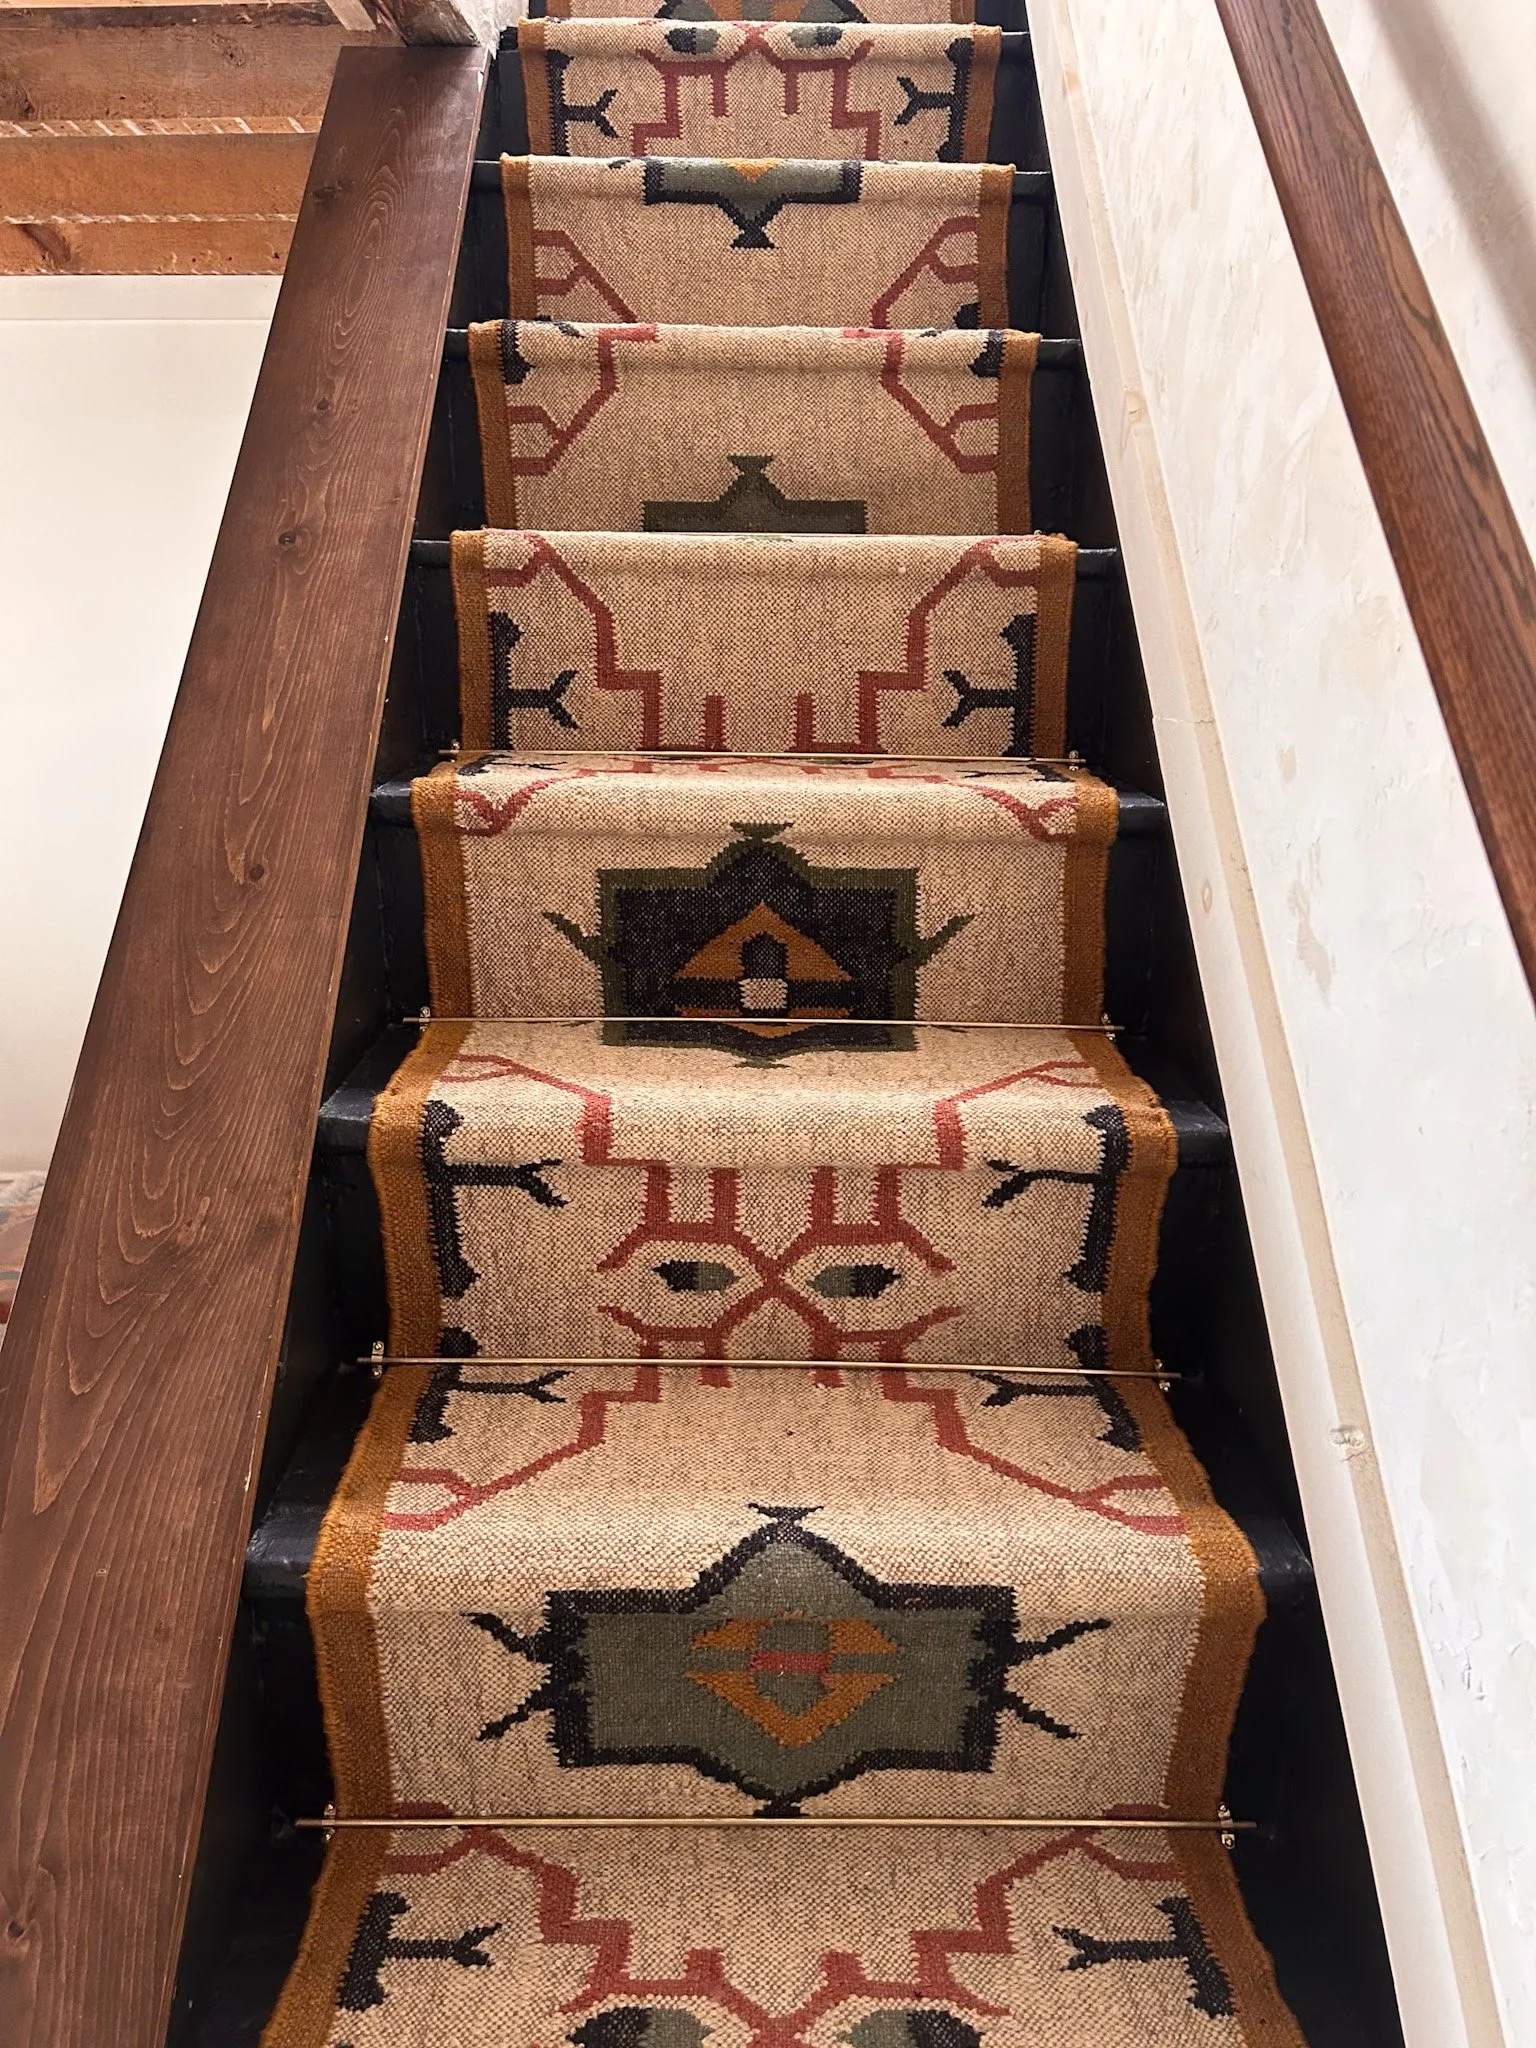
I absolutely love the way this brass detail turned out. These rods took the stairs from slightly boho to modern vintage - my favourite! Mixing styles is kinda my thing, and these stairs fit perfectly in with the rest of the house.
I feel like this simple stair runner installation gave so much light and life to my stairwell! I love the colors and how warm and cozy the rug makes the space feel. I also love that Kenobi (my pup) is so much safer going down, and so am I.
Thanks for following along with my step-by-step guide to a stair runner of your dreams! I would love to see how your runner turns out, so please tag me @diydanie with your finished results.
Until next time!

