Make a DIY Queen Headboard with Hanging Pillow Accent
DIY friends! Today I'm going to bring you along as I create a DIY queen headboard for the bed in my gable-style guest room. I decided I could make something to size that would add to the warm and cozy English cottage vibe that I'm going for with this room makeover. Come see how I did it!
Is it cheaper to make your own headboard?
The eternal question: to buy or DIY? In this case, I had two choices. I could either buy a headboard at a store and modify it somehow to fit my specific needs (not a lot of room under that sloped roof for a traditional-sized headboard), or I could create something from scratch that I knew would work perfectly for my space. Price is always a consideration too! The fact is that headboards are EXPENSIVE, and if I could DIY something for cheaper that would be another win. I built this headboard from scratch and only spent $249 on materials, so it's perfect for a small budget makeover. That total cost is MUCH cheaper than anything you would buy in a store made out of solid hardwood. So, my answer is yes! It is cheaper to make your own headboard, and a lot more satisfying too.

What is the best material to use for a headboard?
I had a plan for how I wanted my headboard to fit in with the general theme of my room. My vision for the entire space is a "light academia" look. I wanted lots of antique, vintage-y books, flowers, and embroidery for an English cottage vibe and warm and cozy wood tones with a light paint colour throughout. So, I knew the best material for my headboard was solid wood. (You all know I cannot resist a gorgeous wood headboard design.) While it might work for some people, I knew an upholstered headboard was not right for my space.
THE MOOD BOARD

While looking for some DIY headboard ideas online, I found an inspiration picture of a canopy bed made from solid wood with rounded posts that I knew would be perfect. Another element I loved from this photo was the beautiful pillow hanging from the headboard. It was tied to the corner posts and hung between them to give a softness to the wood.
I decided then and there that I would make my very own pillow to recreate the same style.


Armed with my general sketch and a vague idea of how I was going to accomplish all my goals for this queen bed headboard, I got to work. I took exact measurements of the space where my headboard would sit. The bed frame I was currently using was a queen size frame from IKEA with the headboard piece removed. The frame was perfectly functional so I opted to keep this and custom fit a headboard to it.
I knew I wanted rounded posts and a large solid piece of wood as the main part of the headboard. I researched my options and discovered that round wooden dowels were WAY too much money. Another option was using handrails for stairways. These were much more affordable and could be purchased to size at my local lumber yard. I decided hardwood would be the way to go, so I purchased some rounded oak handrails for the pillars and a piece of high-quality oak plywood to form the back of the headboard.
Tools and Materials Needed
Because this was really two projects in one, the tools and materials list looks a little daunting! But never fear, I will walk you through when to use each tool and how.
The headboard
Two oak handrails
4x8 oak plywood Sheet
Wood glue
Early American wood stain
Satin finish
Washer/nuts/bolts (for attaching to the bed frame)
Miter saw
Sandpaper
Pocket hole jig
Router (and round over bit)
Drill (and metal drill bit - only if you have to drill through your bed frame to attach the headboard)
The pillow
Fabric for the pillow (I chose oatmeal-colored cotton)
Ribbon to attach the pillow to the headboard (berry-colored)
Yarn for tufting (berry-colored)
Batting
Measuring tape
Scissors
Sewing pins
Sewing machine
Darning needle
Watch How I Build a Queen Sized Headboard DIY on YouTube
Building the headboard
Step 1: Cut the handrails to the length (41.5 inches)
I did this with my miter saw.
Step 2: Cut 4x8 plywood sheet to size
Using my circular saw with a kreg-jig rip guide attached to it, I cut the length.
To make the short cut, the rip guide wasn’t useful. I opted for the quick cut method: clamping a piece of wood across the center and using that as my guide to run my circular saw against.


NOTE:I made the length 1/4” longer on each end. This is to account for the handrails that have a small 1/4” dado groove in the back. The goal was to have the plywood edge sit into this groove so I needed that little bit of extra length!
STEP 3: TO EDGE-BAND OR NOT TO EDGE-BAND?
Figuring out how to make a seamless-looking edge on the top of the headboard took me a little time. The easy way out would be to edge-band the top (to cover the plywood edge), but I decided it would look more finished if I cut the top at a 45-degree angle and added a second shorter piece (the same width as the dado groove), also cut at a 45-degree angle. This way, the two edges lined up nicely and created a seamless flush edge. This plan also solved a problem with the handrails: the dado groove was bigger than the 3/4" plywood that needed to sit in it. If I finished the top by adding an extra piece of wood, the rest of the gap wouldn't be seen.

NOTE: I also cut a second piece to fit the bottom.
I used my table saw blade set at 45 degrees to achieve this cut. Then, I used wood glue and my nail gun to secure the top to the upper edge of the main piece of plywood and sanded the edges smooth by hand with a piece of sandpaper.

STEP 4: Attaching The Posts
It was time to use pocket holes to attach the posts to the sides of the plywood. I drilled pocket holes into the back sides of my headboard then used pocket hole screws designed specifically for hardwood and my impact to make the posts secure. I added some wood glue to the dado groove for good measure.


STEP 5: Finishing the Posts
My two posts stuck out past the headboard by 2”, exposing the dado groove. To fill this in, I took a piece of scrap oak left over from another project and ran it through my planer until it was 1/4" thick. Then, I cut two pieces to size to fill the gap on each post and wood glued them in place!
I realized I didn't love the sharp cut edges of the posts. I wanted softer, rounder lines. So, I got out my router and round over bit. I clamped the headboard down so it wouldn't move and routered the ends of the posts. This softened those sharp lines just as I hoped it would! I sanded the post ends and the rest of the headboard down so it would be ready for stain.

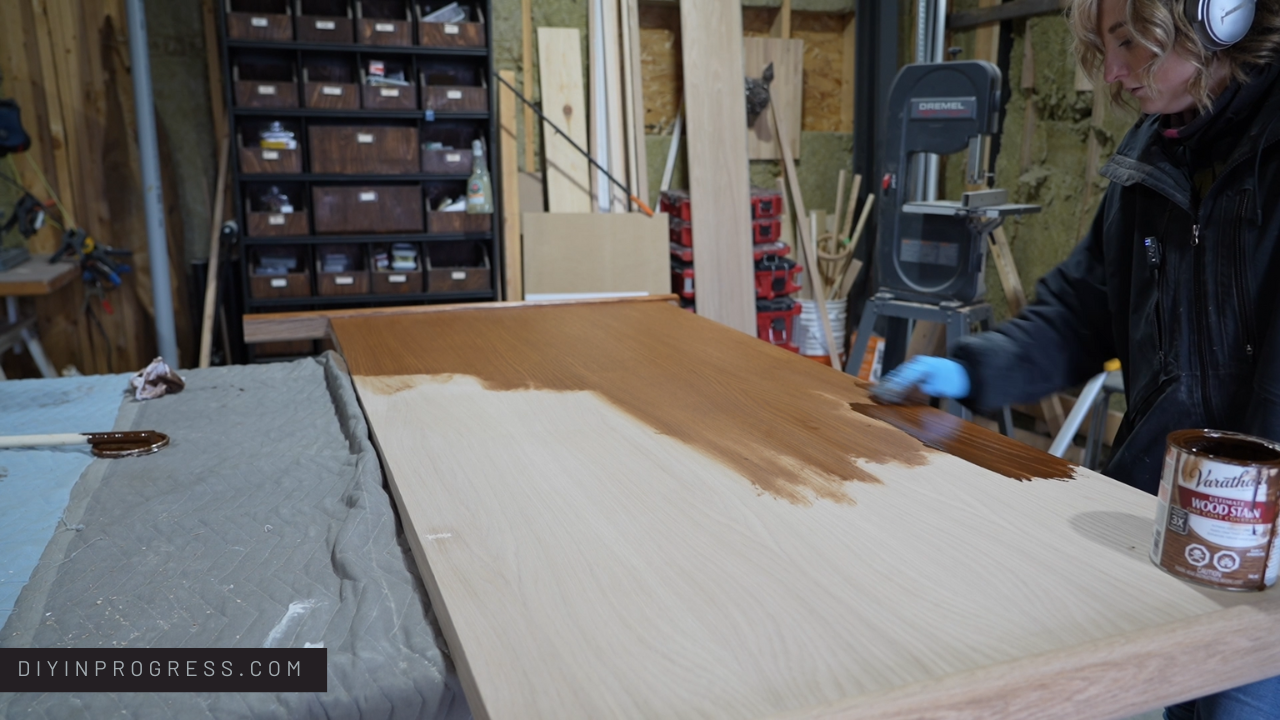
STEP 6: Staining the headboard
It was time to stain!
STAIN COLOUR CHOICE: Early American
I applied the stain with a soft cloth in long, even strokes. When it was dry, I applied a protective sealant in a satin finish.
Time to sew, gulp!
I could put it off no longer: it was time to sew.
I'm much more comfortable using power tools than my sewing machine, but I just knew that a DIY pillow was exactly what this headboard needed to really finish the vision. I didn't want it to cover the entire headboard (that would be more like upholstery) but rather just to accent it and add some interest.
The first step was choosing a fabric. I wanted the pillow to match the bedding I had already purchased. The sheets I chose are a deep berry and oatmeal gingham pattern. I decided to pull the oatmeal color for the pillow fabric so it wouldn't compete with the pattern. I bought solid berry-colored ribbon to act as ties for attaching the top corners of the pillow to the posts. I also purchased some berry-colored yarn to tuft the pillow and create small crosses in two rows all the way across.
Step 1: MEASURE, CUT + PIN!
I measured and cut out my oatmeal material. I folded it in half (the size of the finished pillow), and pinned the edges. I also pinned the ribbon ends to the inside of the fabric (this meant the ties would be on the outside when I was done and turned the whole thing inside out).

STEP 2: SEW + STUFF
I sewed a simple seam along the outside edges on three sides, and then I turned my newly created pillowcase inside out. Next, I filled the pillow case with a layer of batting until it was firm enough, but not too firm.
STEP 3: X Marks The Spot!
I determined a general spacing and used pins to mark where I wanted my little tufted yarn crosses to be. I decided to do two lines of crosses, one above the other, along the whole length of the pillow.
I used a darning needle (an upholstery needle would work too) and a template I created to keep the cross stitches consistent in size across the pillow. I marked the dots on the pillow with a marker and then played connect the dots with the needle and yarn. As a newbie sewer, I don't think I did half bad! I've learned that a simple design is the way to go when you're doing something new. The tufted look I achieved was exactly what I had pictured when I started.

How do you attach a queen headboard to a bed frame?
There are two options for attaching a new headboard to an existing bed frame. The first is called frame mounting, and it works for most situations. To see if your bed frame can easily take a headboard, just check the head of the bed frame for oblong holes near the left and right corners. If they are there, it should be easy to use a bolt and nut combination to add a headboard to the frame.
Do headboards work with any bed frame? In certain cases, the answer is no. This doesn't mean it is impossible. It just means you need to be a bit creative. My queen size bed frame did not have these oblong holes, so I had to use my drill and a heavy duty drill bit for metal to make holes where I needed them. I lined the headboard up with the metal frame and marked where the matching holes would need to go and drilled them through the wood too.
I used a washer-nut-bolt combination through the new holes in the bed frame and headboard (two holes on either end and one in the middle). I worked from the back side of the headboard for easy access. This was hard work and I sometimes wished I had opted for a freestanding headboard instead! But in the end, it was a fairly straightforward task to attach the headboard to the bed.

Finishing Touches
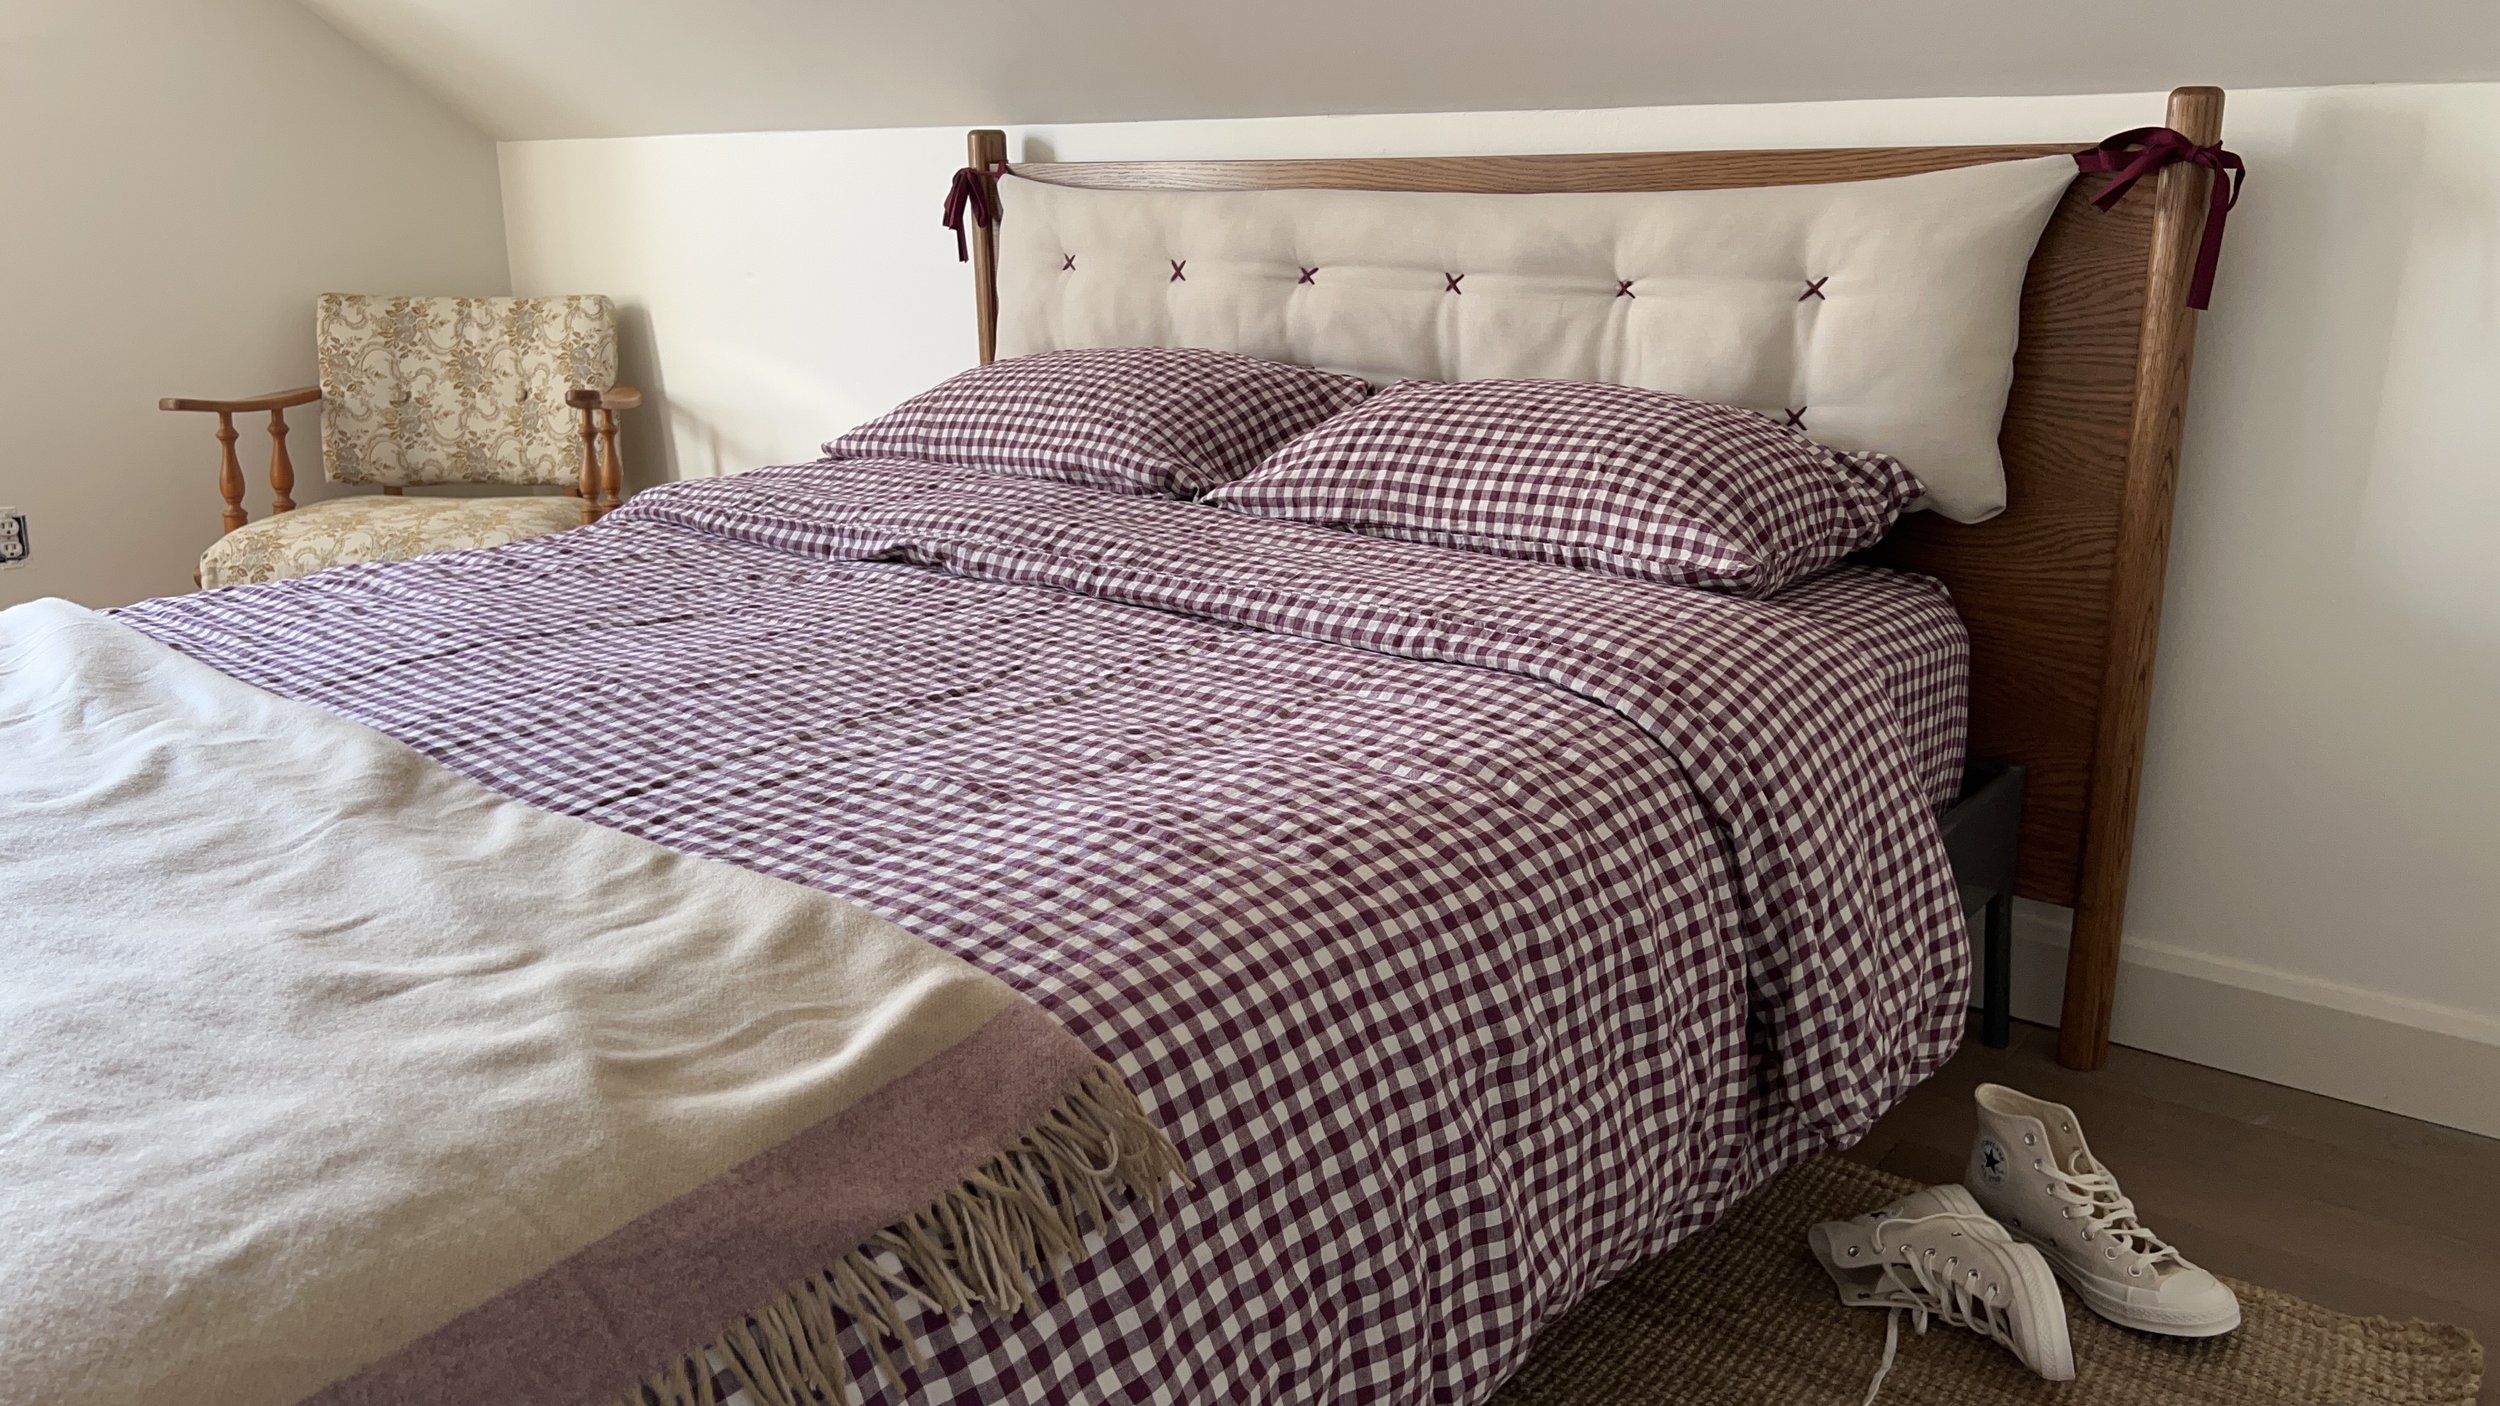
I finished up by hanging the pillow to the wood posts and making the bed up with the new berry coloured gingham bedding. When I saw the headboard pillow behind the other pillows on the bed, I knew I had done the right thing! The textured pillow added interest to the space and made the wood look warm and cozy rather than bleak and uncomfortable. It was the perfect mix.
This was one of those DIY projects that totally surpassed my expectations! The headboard itself turned out so professionally and I think it looks like I walked into a store and bought it. The pillow? Well, the pillow LOOKS like a DIY. But it's cute as a button and pairs so nicely with the wood at the front of the headboard. This whole project is exactly what I wanted it to be.


Thanks for sticking around for my queen size headboard tutorial! Would you ever attempt something like this for your guest bedroom? Leave a pic of your DIY headboard if you have one in the comments or tag me @diydanie.
