Powder Room Makeover (+DIY Dresser Turned Vanity Upcycle!)
Everyone has that ONE ROOM in their home they don’t want anyone to see. For me, that room was my main floor bathroom! This is a shared laundry room/powder room area that also serves as a utility sink area for my studio projects. It was dirty, messy, dated, and I hated everything about it. Come see how I gave it a budget-friendly facelift without doing any major renovations!
Materials
Paint Colour - Mourning Dove, Behr - OR -W12 DAP
Bath Lighting - CDN or USD (similar)
Small Ikea Shelf (similar)

Step 1: Paint
The timing wasn’t right for me to do any big changes in this space. But one of the easiest and most dramatic changes you can make in a space is painting the walls, so that’s where I started!
These were my steps:
Close off water lines to Vanity
Drain the P-Trap
Remove the old vanity
Spackle, patch, and sand holes and divots that needed to be smoothed out on walls
Washed the walls
Painted two coats of warm white in the colour: Mourning Dove, Behr - OR -W12
Step 2: Vanity DIY

I found an absolutely stunning vintage dresser on Facebook Marketplace for the low price of $80. It was just my style and I fell in love with it right away. I didn’t mind putting some work into it because I knew it would be incorporated into any future changes we make in the room. Here’s what it had going for it:
Curves
Beautiful hardware
Gorgeous detailing
Solid bones that allowed me to make changes to the main structure
Once I had the dresser in my possession, I headed to Home Depot and picked out a white sink that most closely matched the lines of the dresser. While I was there, I also bought a gorgeous brass half-moon style vanity mirror.
Then it was time to turn my dresser into a vanity without ruining its aesthetic. Basically, the challenge was to make room for the sink and the interior plumbing without ruining the way it looked or eliminating all of the storage. To do this:

I used my multi-tool to take off the back of the dresser
I removed the sections of the drawer frames where the sink and new plumbing would sit inside the dresser
I used pine lumber cut into strips to rebuild the back and the drawers
I cut a notch out of the legs in the back for the pipes to sit in
When I was done, the dresser looked exactly the same from the outside and had these internal changes:

The top drawers were now just decorative fronts
The middle drawer was now a demi-drawer with a space cut out of the centre
(The bottom drawer was unaltered)
A sink-sized hole was cut in the top of the dresser

When I installed the vanity, there was a tiny little gap between the wall and the countertop.
I cut a piece of pine trim
I routered the edge to give it a decorative detail to match the vanity
I stained it to match the vanity
I installed it on the wall so the top of the vanity would sit right under it
Step 3: I Need A Utility Sink - ASAP!

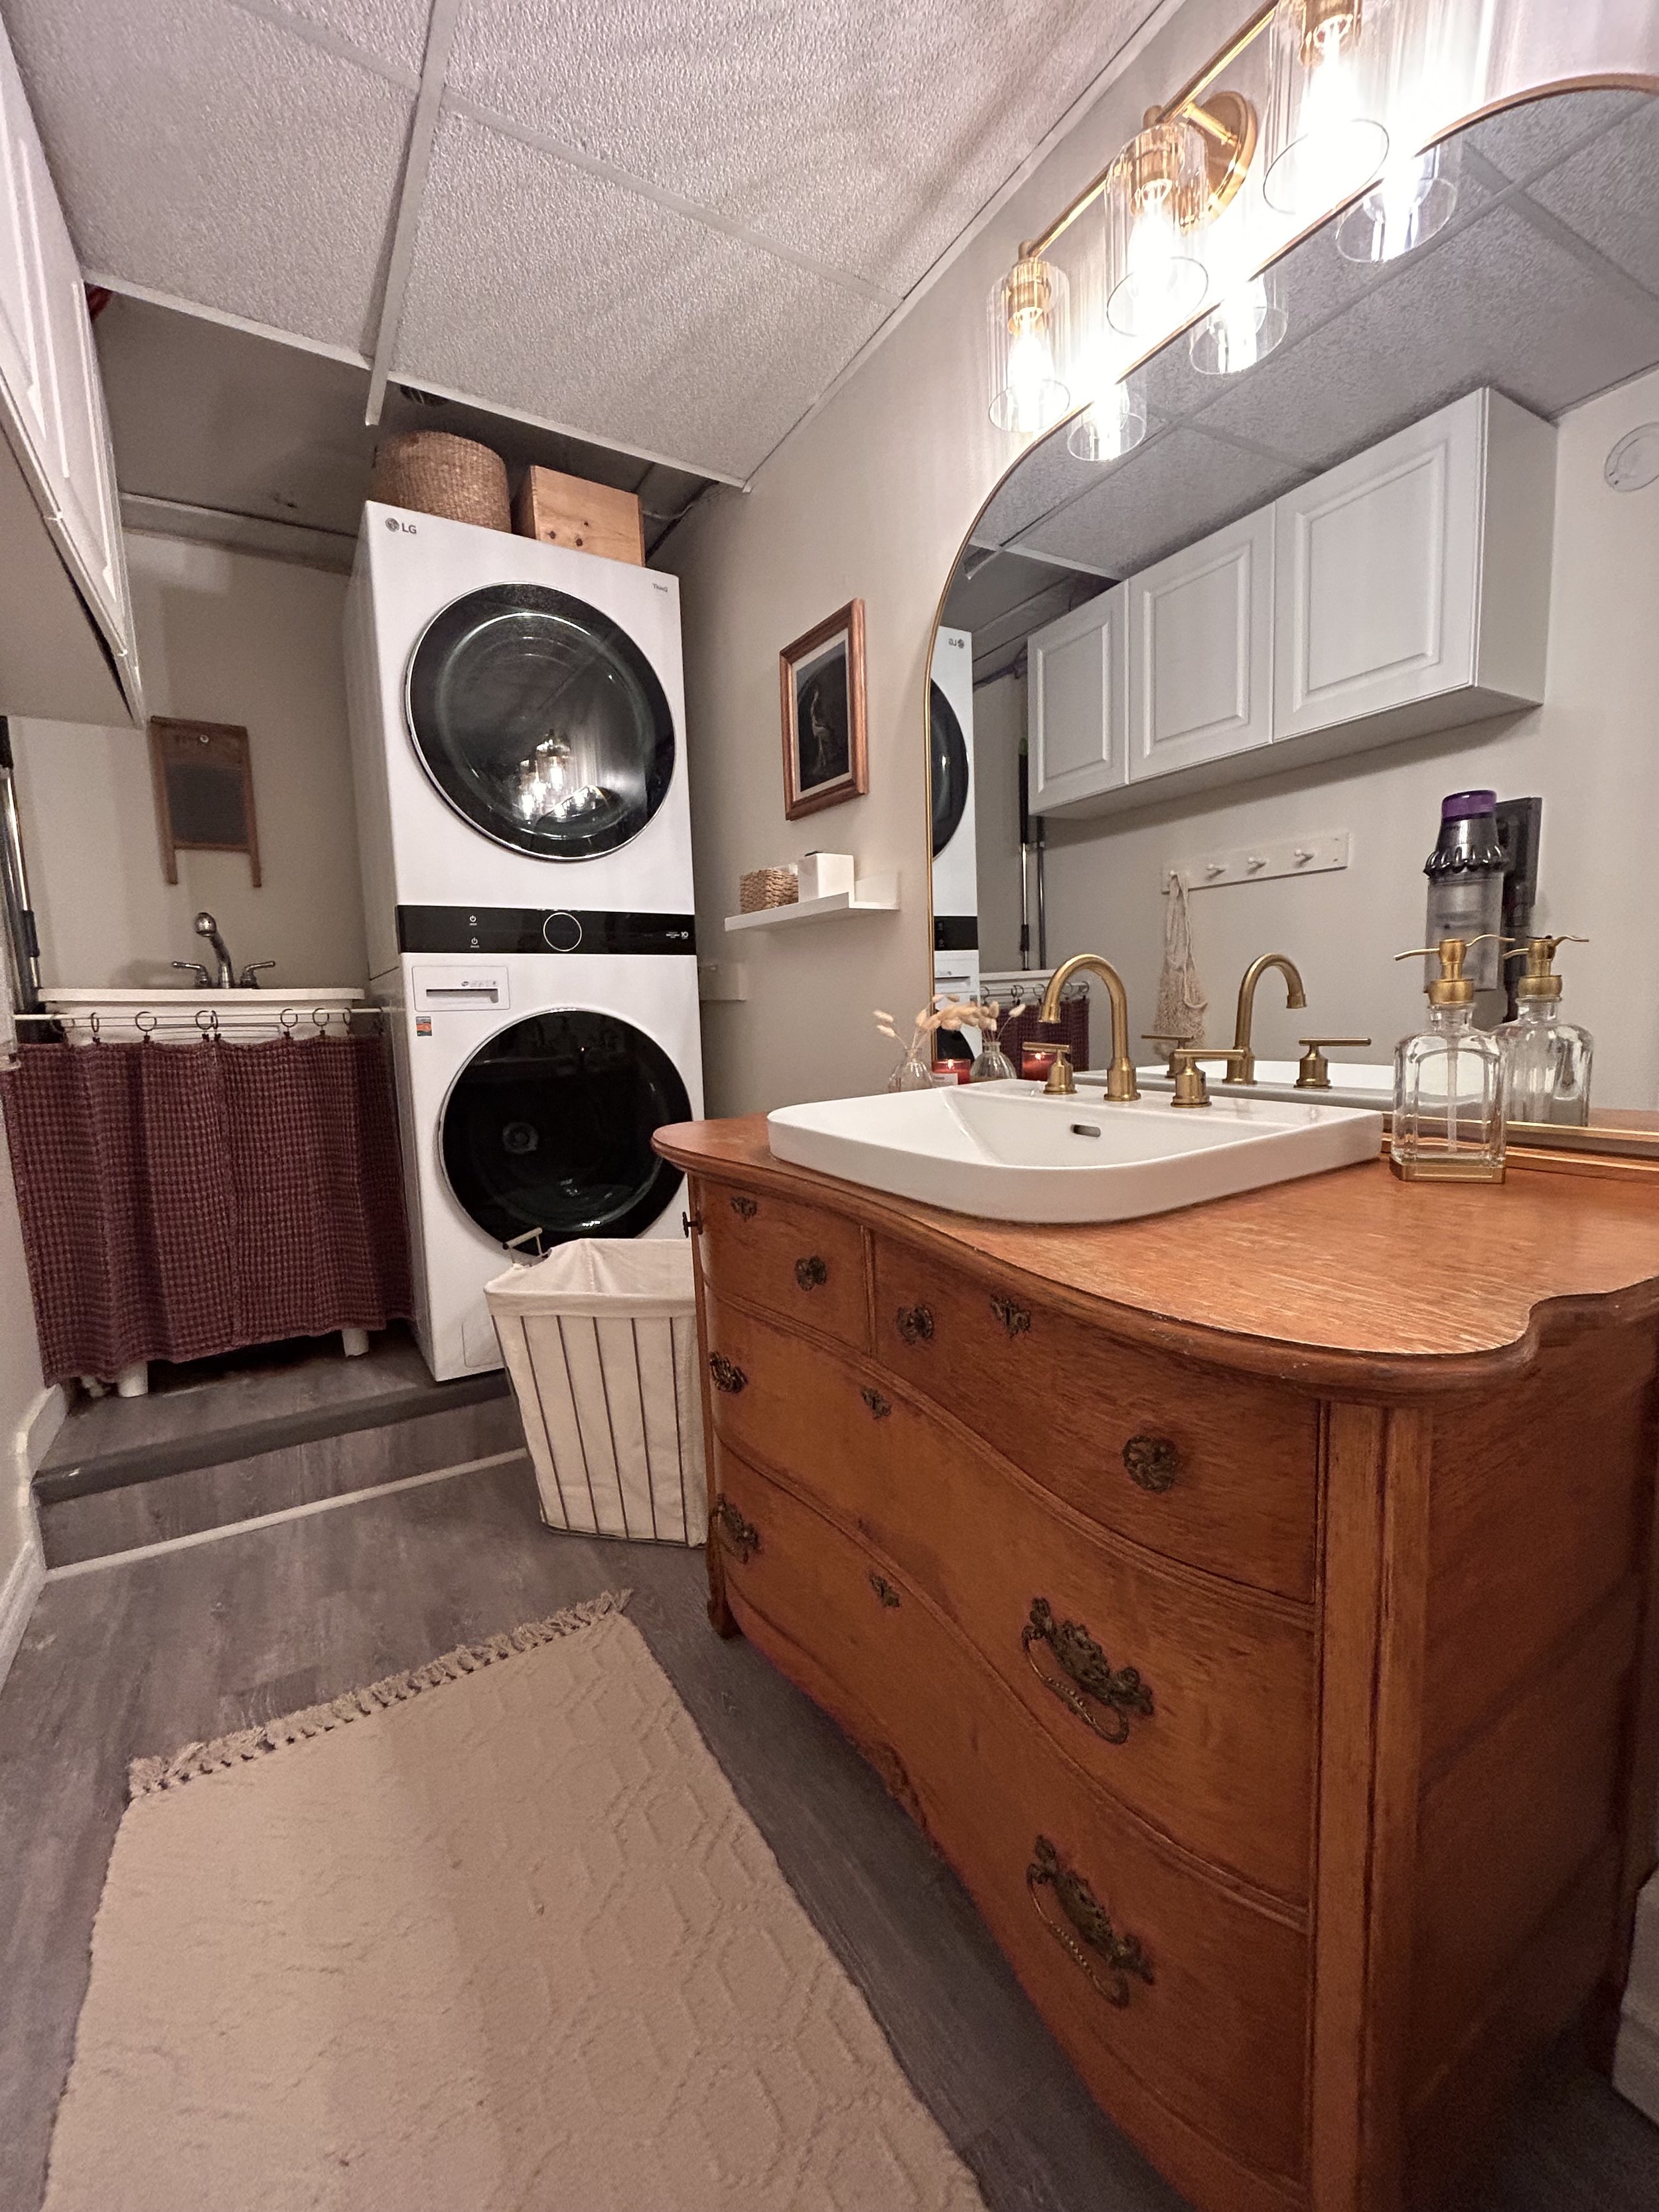
If you’re wondering how I’m going to prevent my beautiful new sink and vanity from turning into a Jackson Pollock inspired utility sink again, I’ve got a quick and easy solution! I found a cheap utility sink on Facebook Marketplace.
It fits perfectly in the space beside the stacked washer and dryer
It has a functional shelf underneath it
The faucet is attached to a hose that can be pulled out to spray a bigger area
Is this my permanent solution? No! Is it good enough for now? Yes!


Step 4: Finishing touches
Once the major work was done, I finished off this quick bathroom reno by adding:
A brass faucet, toilet paper hanger, and towel ring
Quick DIY Note: I used DAP AMP Advanced Modified Polymer Waterproof Sealant for Kitchen, Bath, and Plumbing in Clear to seal the gap between the sink and the vanity top. We don’t want spilled water running underneath or your vanity sink to move!
A beautiful brass and ribbed glass light fixture (Amazon!)
The half-moon mirror I bought at Home Depot
A peg rack and small IKEA shelf to the utility sink/laundry area
Art pieces beside both sinks
Vanity-top decor (including a ring holder)
Burgundy hand towel for a pop of colour
A Neutral rug
A tension rod, cafe clips, and two more burgundy hand towels as a curtain to hide the utility sink shelf
See my laundry/powder room makeover here!
Even though this isn’t the bathroom of my dreams that I’m hoping to have one day, it is one million times better than what was there before! Sometimes done is better than perfect, and that is definitely the case here.
What could you do to make one room in your house better but not perfect? Share your ideas in the comments or tag me with your before and afters @diydanie on Instagram!
