IKEA TARVA Dresser Makeover (Samantha Dresser by Lulu and Georgia Dupe!)
Today we're talking about the absolutely gorgeous Samantha dresser from Lulu and Georgia. I love this dresser: the colour, the simple lines, the beautiful scallop detailing on the top drawer, the rounded legs, everything! What I don't love? The $3700 price tag! So, I decided to try a new IKEA TARVA makeover and see if I could make this stunning piece of furniture myself. Stick around and see how I hacked a basic TARVA dresser into a custom, elegant 6-drawer chest that fits my own personal style.

IKEA furniture is such a great blank canvas for a hacking DIY project! It's inexpensive, easy to stain, and you know what you get, every single time. I decided to go with the TARVA dresser because it was the perfect height, length, and depth for a Samantha dupe. The TARVA line has a plain and simple pine dresser, which makes it easily customizable. I knew I could give it a new modern look with just a few tweaks. So, let's do this!
Tools and Materials List

1 TARVA dresser (new in box)
(6) 15/16th Quarter round trim
Painter's tape
WoodPro All Purpose Wood Filler (in walnut)
Acrylic water-based paint
Water Dish
MixWax Satin Finish (sealant)
Brad nailer
Jig saw
Sand paper
Hardware jig (optional)
Buy the furniture (and plan your attack)
The first thing I did was go to IKEA and pick up a brand new unfinished pine TARVA dresser, still in the box. Why did I not thrift something to hack, you ask? For the look I was creating with this dresser, I needed to be able to make cuts and adjustments before it was put together. So, purchasing something used and already assembled would not work for this particular project.
The legs

To solve the problem of the square TARVA legs, I decided to build new ones! I went to my local lumber yard and picked up some 15/16 quarter round trim. I decided I could glue three of them together to form a round leg that would be round on the outside but fit around the 90 degree corner of the dresser. Brilliant, right?? To make these new legs:
I used wood glue to join the first two pieces. I taped them together so they wouldn't move while the glue was wet.
Then, I put some brad nails in them for extra strength.
Next, I glued and nailed the third piece on.
Watch my IKEA Tarva Dresser Makeover
The drawers
New legs meant that the drawers had to be sized back to accommodate the overhang of the quarter round trim. To make the pieces of the dresser fit the new design, I had to:
Trim the outside drawer fronts by 1 1/8”
Drill new holes on the fronts 1/2” from the edge
Deepen the dowel holes on the sides (as we just cut 1 1/8” from it)
Trim the drawer sides by 1/2”
Trim the drawer back panel to fit the new drawer size (1/2”)
Trim the drawer bottoms to fit the new drawer size (1/2”)
Trim the front of the dresser lip so there is no over hang.

I needed to make these cuts on only one side of the drawers (the exterior sides that would be covered by the quarter round legs). To do this step correctly and make sure I didn't get confused by all the different pieces, I decided to sort all the pieces for every drawer into separate piles and mark them. This step was essential to make sure I didn't get the left drawers and the right drawers confused and trim the wrong piece! So:
On the image of the finished dresser in the instructions, I marked the top left drawer as "1".
Then I found all the pieces that would make up that drawer and taped the number "1" to them.
I did this for all six drawers, and then I marked the exterior sides that would get trimmed.
Once all the math was done (I think this was the hardest part of this entire DIY), I got my table saw out and made all the necessary cuts. Then I used my drill to make new holes or deepen existing ones where necessary.

Scallop detailing
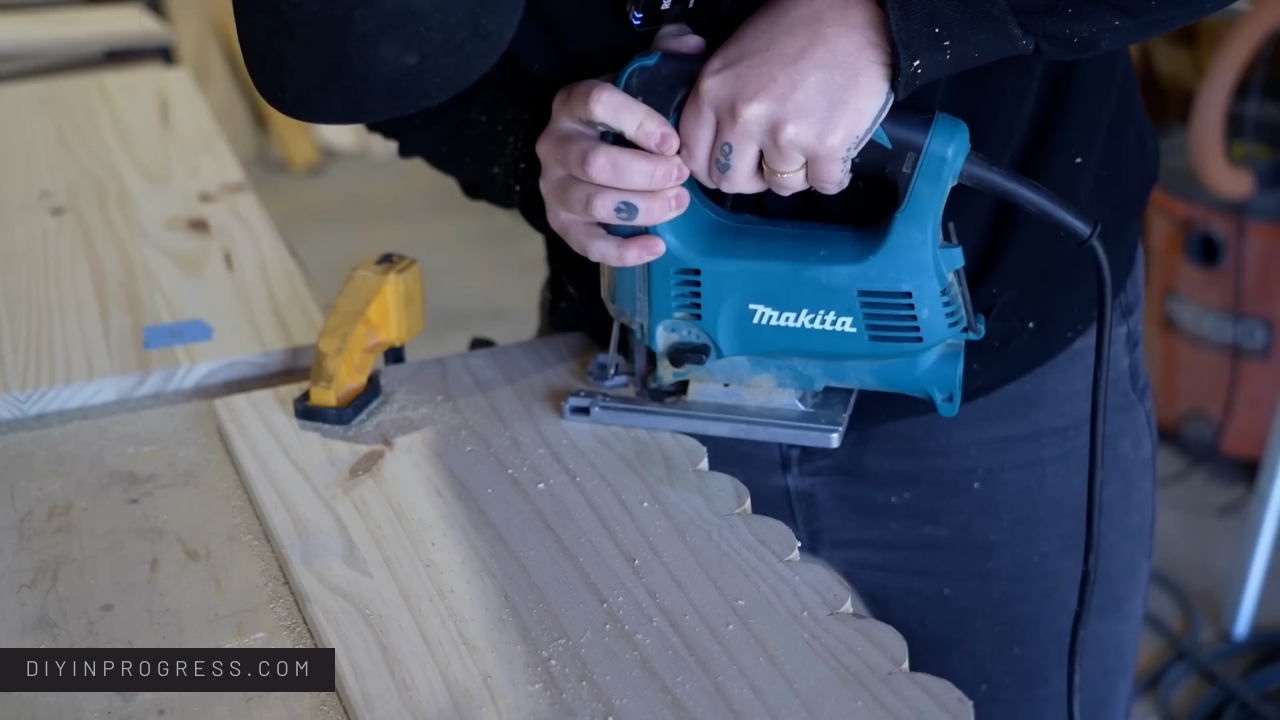
The scallop detailing was one of the most important parts of this IKEA TARVA dresser hack. I used technology to make sure I got it right because this kind of math makes my brain hurt. Photoshop ended up being a great way to ensure that each drawer front began and ended with a half-moon. I simply created a document the same size as the drawer front, then sized circles across it to fit. Once the program had calculated the right size circles for the space on each drawer, I printed out the template it made and taped it to the drawer front. Then I traced the outline of the circles I had to cut onto the wood.
I used my jigsaw and followed the traced lines to cut out all the half-moon shapes. Then, I sanded all the edges down by hand.
Once that was done, I used my wood filler to fill in the original hardware holes that the drawer fronts came with. Then I sanded it again when it was dry.
Putting It All Together

Once the dresser frame was built, it was time to install the new legs! I used my miter saw to cut them down to the correct length.
Then I glued and brad nailed them to the corners of the dresser as the new legs. This worked perfectly! I was so excited to see those legs installed. I installed a fourth piece of the quarter-round at the bottom of the leg where it would be seen between the floor and the bottom of the dresser to give the impression of a fully rounded leg.
Then I put the drawers together. They fit perfectly in the frame! The entire dresser was coming together so beautifully.
Finishing Touches
Once I knew my new dresser hack had worked, it was time to make it pretty!
I didn't love the visible space at the top of the dresser drawers under the scalloped edges. So, I used the piece intended as the apron on the bottom (which I no longer needed) to attach to the top of the drawer frames to fill the gap.
Then, it was time to fill cracks and holes. I used a combination of sawdust (from this project, so the wood colour will match perfectly) and wood glue to make a paste and fill the brad nail holes and the visible lines where the pieces of the quarter round were glued together. Then, I sanded all the surfaces smooth with my power sander using 120 grit and then 220 grit sandpaper.
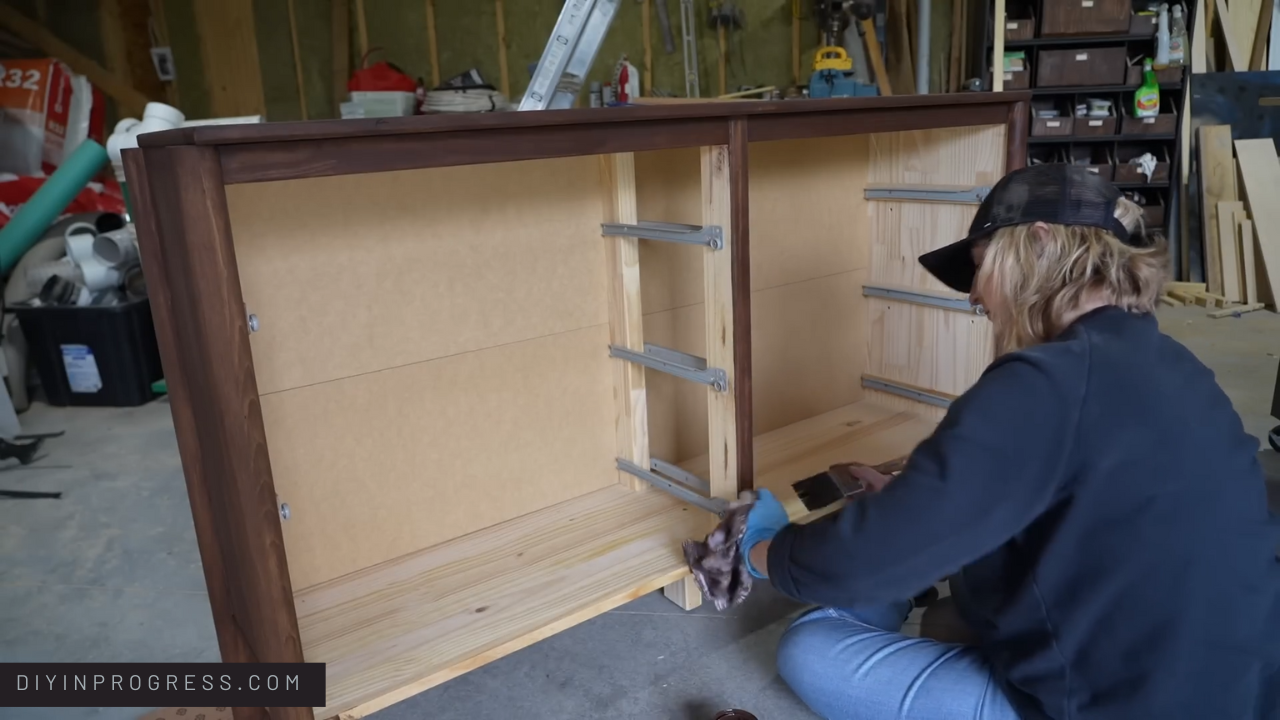
Once it was all sanded, it was time for colour. I went with a painting technique that involves diluting the paint with water so that the wood grain will show through like it would with stain, but without the blotchiness!
To apply your paint-stain like I did, first dip your brush into your paint, and then dip it into a bowl or bucket of water before you apply it to the wood. This gives you a lovely even application and the wood grain will still show through! One coat of paint is enough with this technique.
Once the paint-stain was applied, I put two layers of protective topcoat sealant over it to protect it and give it a beautiful shine.


Then it was time for new hardware! I think this is the best part of any project. I found some beautiful antique gold finish pulls at Home Depot that very closely match the Samantha dresser pulls. (These were a close second choice.) I used my hardware jig to install them.

And, that's it! My gorgeous Samantha dupe IKEA TARVA dresser makeover is now styled beautifully in my spare room, and no one would ever know it isn't an expensive designer piece worthy of a spread in Apartment Therapy. I absolutely love everything about this project, including the price tag. Instead of $3700 for the actual Samantha, I paid $740 for materials for my version. Definitely worth the time and effort to create such a beautiful piece of furniture! Do you have an IKEA hack you're proud of? Share it in the comments or tag me @diydanie with your pics!