Neon Maximalist Gallery Wall: How I Did It + Tips and Tricks
Welcome back! Today we are tackling an epic gallery wall project. It’s full of DIY, colour, maximalism, and creativity: all the things we love here at DIY in Progress. So many people ask me about how I create my gallery walls that I thought it was time to show you how I do it in real time. So, let’s get to it and create a giant gallery wall together!
Today’s challenge is brought to you by my friend Jes and her mix of styles. She wanted me to create a colourful, neon gallery wall in her mid-century modern home. Here were her requirements:
Filled with colour
Jungle-themed
Touch of mid-century modern
Let’s get started!
How to Create a Maximalist Gallery Wall
The frames
The first thing I did was work out a collection of matching frames. When your art pieces are very different from each other, having similar frames can really pull the whole thing together nicely. I decided that most of the frames in this gallery wall would be black (in keeping with the mid-century modern style).
However, I wanted to bring out the neon-jungle vibe in a few special pieces! I picked four art pieces and DIY’d a frame for each using neon-coloured acrylic.

Materials and tools

4 colours of neon acrylic (I chose yellow, pink, green, and blue)
4 pieces of art (preferably in different sizes)
Weld-On
Gloves and mask
Needle nose applicator (you only need a few drops of Weld-On!)
Angle clamps
¼” foam core
Spray adhesive
Bumpers


I got the acrylic cut to size at the store where I bought it. I put the frames together using my angle clamp (to make sure the joints were perfectly square) and a small bead of Weld-On. This product takes 3 minutes to set up and 72 hours to achieve an 80% cure. So easy and mess-free!
When the frames were cured, I cut the foam core to the same size as the art. I used a spray adhesive to stick the art to the foam. I put small clear bumpers on the inside of the acrylic frames and put the pictures in front of them. Voila!

Planning your art placement

It was time to start planning the rest of the wall! This is a VERY important step. You need to make sure everything fits and looks good before you start putting nails in the wall.
First, I sketched my vision. Then, I got out a giant roll of kraft paper. I traced the art pieces onto the paper, cut the tracings out, labeled them, and got to work creating a faux gallery wall in place using painter’s tape.

Putting up the gallery wall
Once the art was all created, it was time to put it all together.
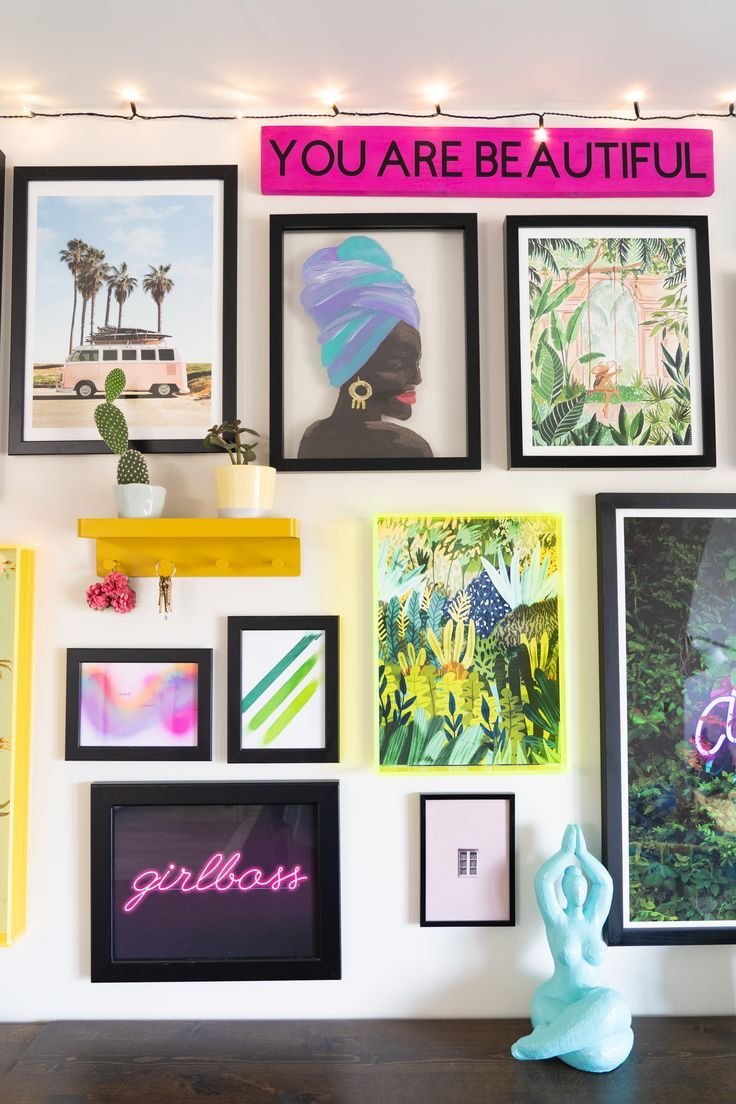
I hung the pictures, some shelves, and a funky light-up banana sign where I had marked them out with kraft paper. I added some string lights at the top and styled the shelves with some plants and decorative items. My friend was THRILLED with her new wall and I was so happy I managed to pull it off!

See the full neon gallery wall DIY
How to make a perfect gallery wall, every time!
Let’s summarize the tips and tricks I used to make this gallery wall successful:
Choose cohesive artwork that tells a story and reflects your authentic style
Bring everything together with matching or complementary frames
Incorporate colours from your art choices into the frames or styling pieces to help with cohesion
Plan your wall! Sketch it and then use kraft paper on the wall to test your design. Don’t be afraid to change things or try different arrangements
Don’t forget that pictures aren’t the only items you can include in gallery walls! Shelves, lights, special objects, plants…anything is game and can be used to add texture and character
DIY adds your personality and is a great way to get a custom piece to fit the space and vibe just right
And there you have it! All my tips and tricks for planning and executing your next gallery wall, plus the beautiful, funky wall I created for my friend. Do you have any other tips for creating the perfect gallery wall for any space? Leave them in the comments or tag me @diydanie with your gallery wall DIY masterpiece!